Install
Download one installer and run it. No admin rights needed — it installs per user.
After installing, .md files are associated with Sunset Editor, so double-clicking
one in Explorer opens the app with that file in a tab. If the app is already running, the tab
is added to the existing window rather than opening a new one.
claude, gemini and codex you already have; it does not
ship them. A provider that is not installed shows a note instead of a session list.
Download for Windows (v3.0.24)
New versions are checked at startup and once an hour after that, and downloaded quietly. When one is ready you are asked whether to restart now; choose later and it is applied the next time you quit. If you do not want to wait, click the version number at the top right and use Check for updates.
Open a folder
Everything starts here. Open your working folder with Open folder ▾ in the toolbar
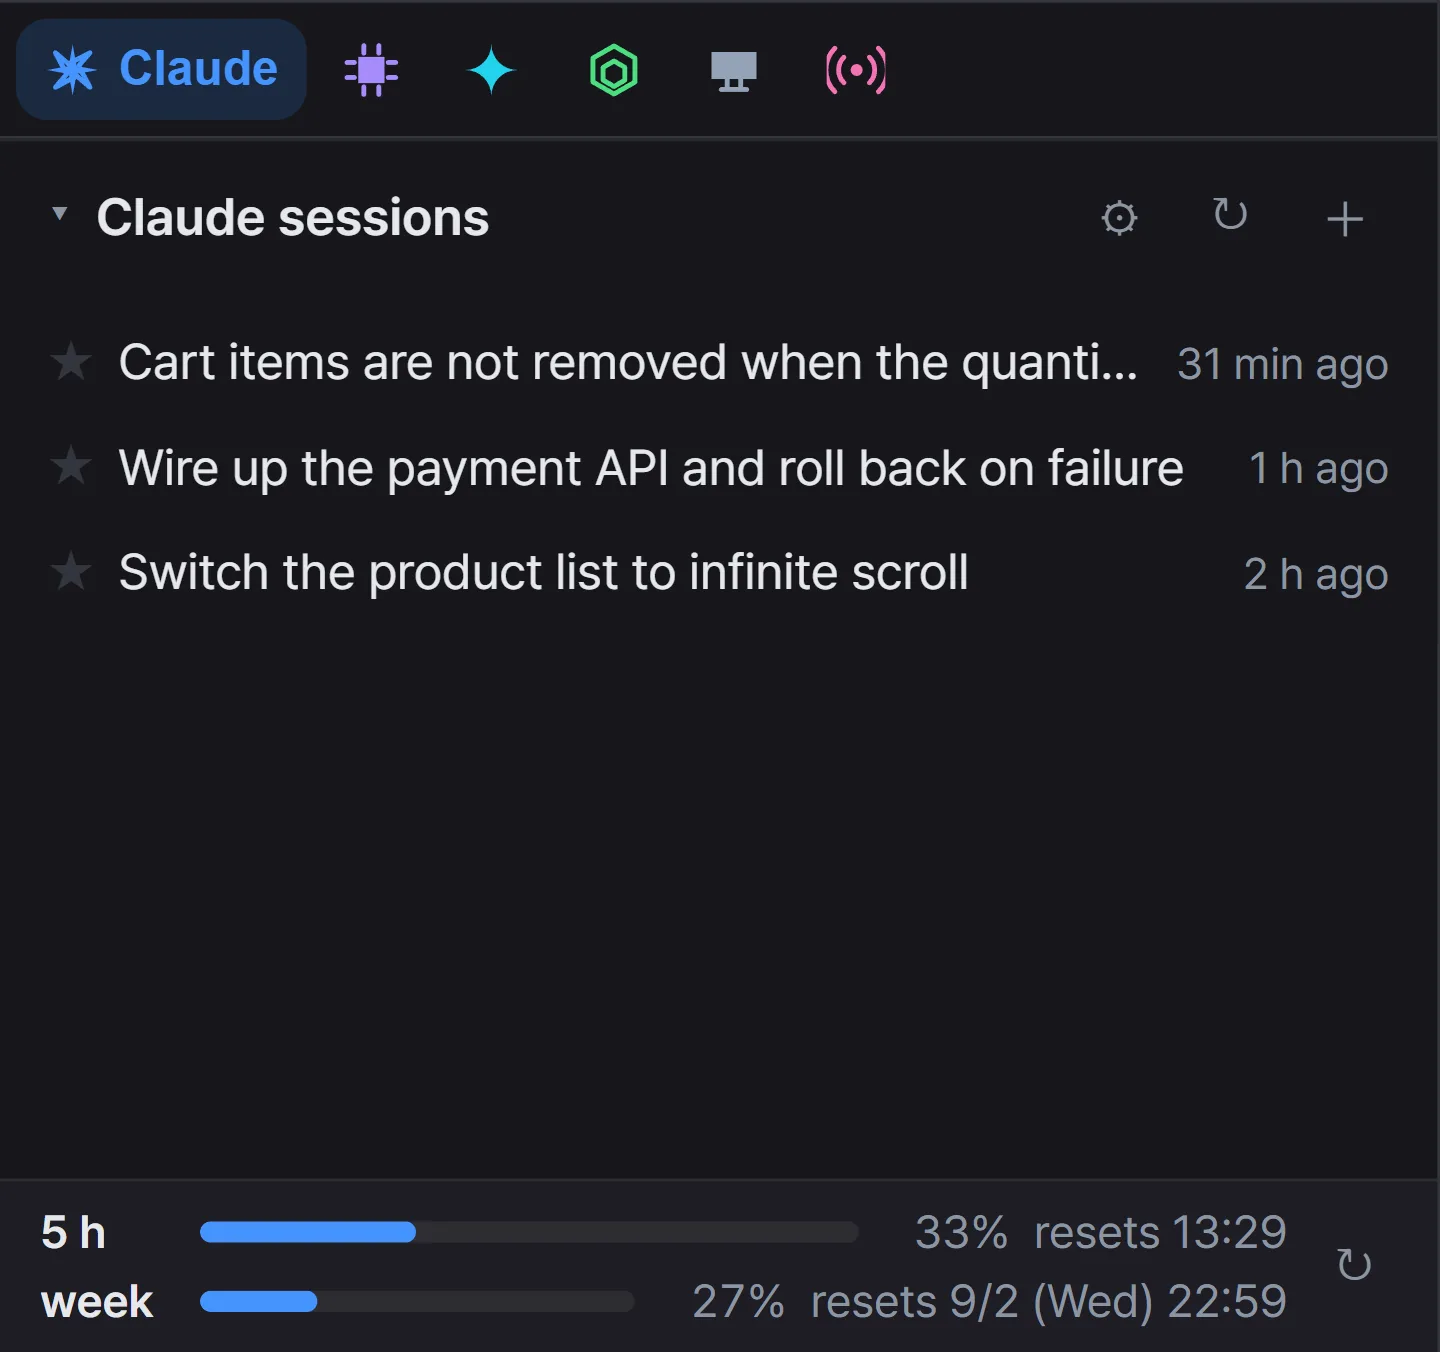
and the file tree appears on the left, with that folder's AI sessions listed below it.
- Press
☆in the header to star that folder. - Any folder you have opened is remembered, so you can pick it straight from
Open folder ▾. - If the folder has a
package.json, a▶ Runbutton appears in the header.
Your first session
Click a row in the session list and a terminal tab opens inside the app,
carrying on that same conversation. To start fresh, press + in the header.
- Rename — right-click a row to rename it. Easier to recognise than the name taken from the first question.
- Star (★) — a starred session stays at the top of the list even in other folders, with a badge showing which project it belongs to.
- Closing the tab also ends the running session, but the conversation is kept. Open it again from the list.
Harness — giving a session its character
A harness is the instruction that session always follows. Write it once and you stop repeating yourself.
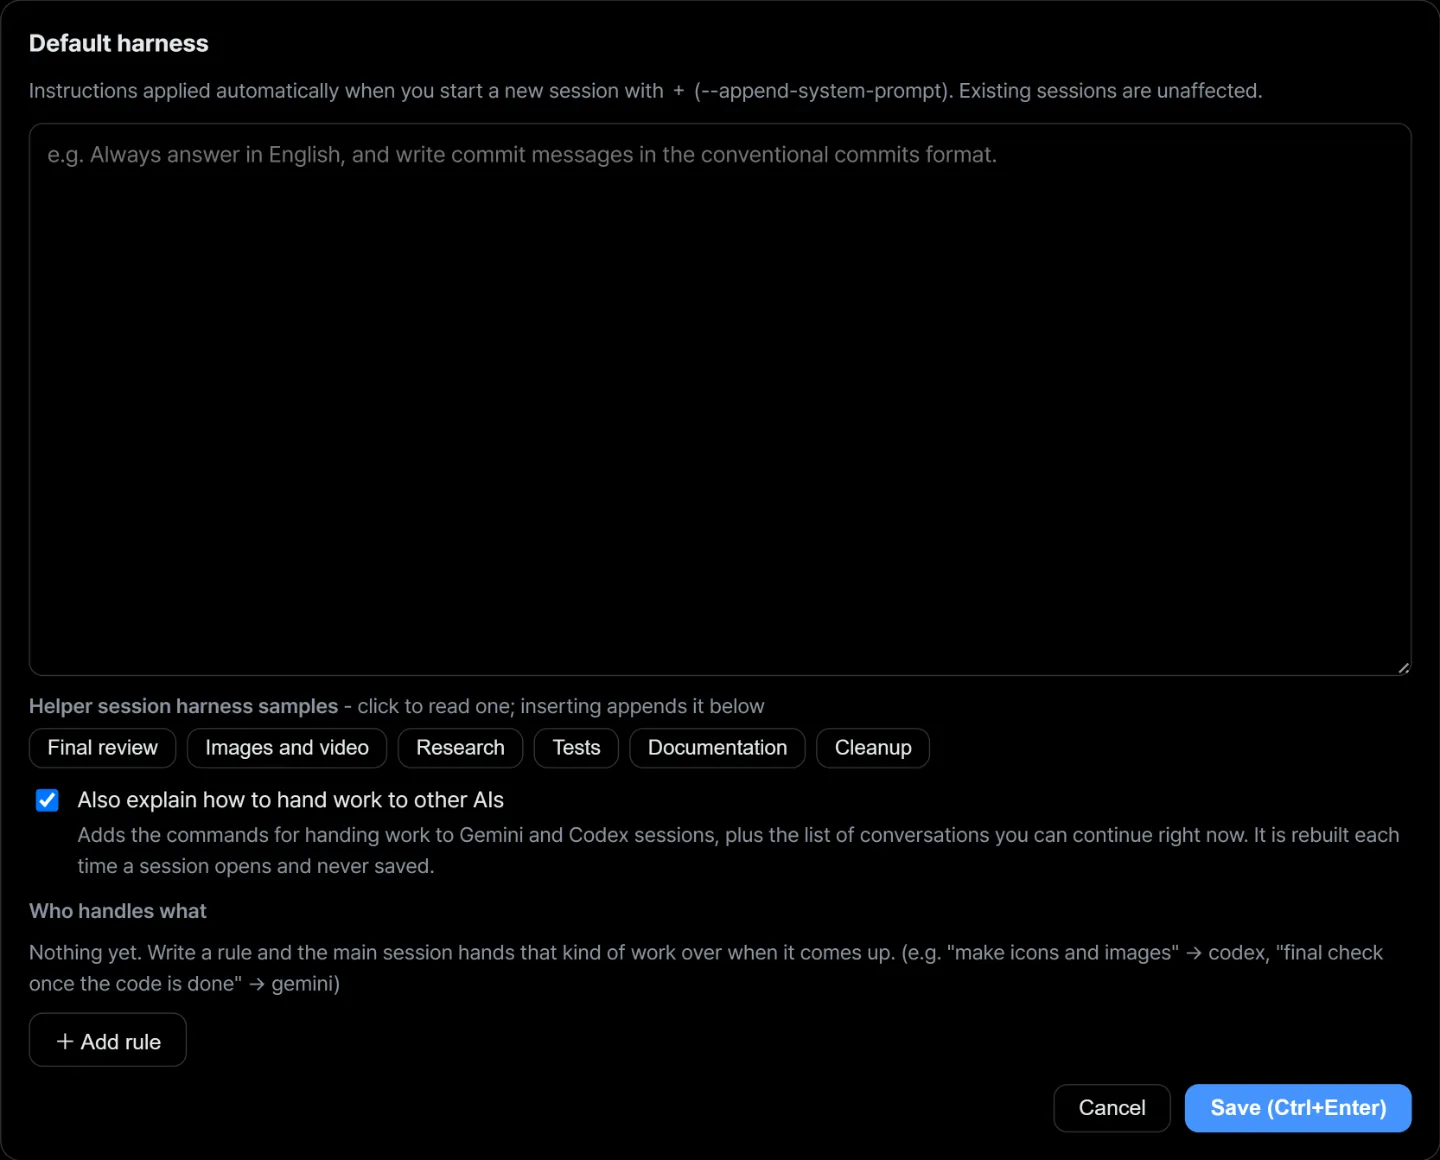
⚙in the session panel header — the default harness. Applied automatically to new sessions made with+.- Right-click a session → Edit harness — for that one session only.
- Under the editor there are six samples (final review / images and video / research / tests / documentation / cleanup). Click to read one and insert it; what you already wrote is kept and the sample is appended below.
Delegation — handing work to another AI
Right-click a session, open Assign delegate, and write down which kind of work goes to whom.
- Write what kind of work it is. For example: "make icons and images"
- Choose who it goes to. Sessions in this folder, plus sessions you starred (★) in other folders.
- Turn Write on and that helper can create and change files. Off, it only reads and answers.
The actual handing over is one line inside the session.
node scripts/delegate.mjs run codex "make me an icon"
That command prints a task number and ends at once. The app finds the request, opens a tab like
Codex: Delegated 3 to run it, and the session that asked carries on without waiting.
More on delegation →
Live rooms — showing your screen
Press 📡 Share in the toolbar from a terminal tab and a room opens. Send the link to
your team and they watch it in a browser — nothing to install, nothing to sign into.
- Open rooms collect in the Rooms tab in the sidebar. Click a room you opened and you jump to that terminal tab.
- Watchers can only watch. Only the host types.
- Hover a chat line and
⌨ Insertappears. It puts that line on the terminal input line, and you press Enter yourself to run it. - SSH server tabs share the same way.
SSH servers
Press + in the Servers tab in the sidebar to open the dialog.
Fill in name, address, user, port and key file, and every click in the list opens that server's
shell in a tab.
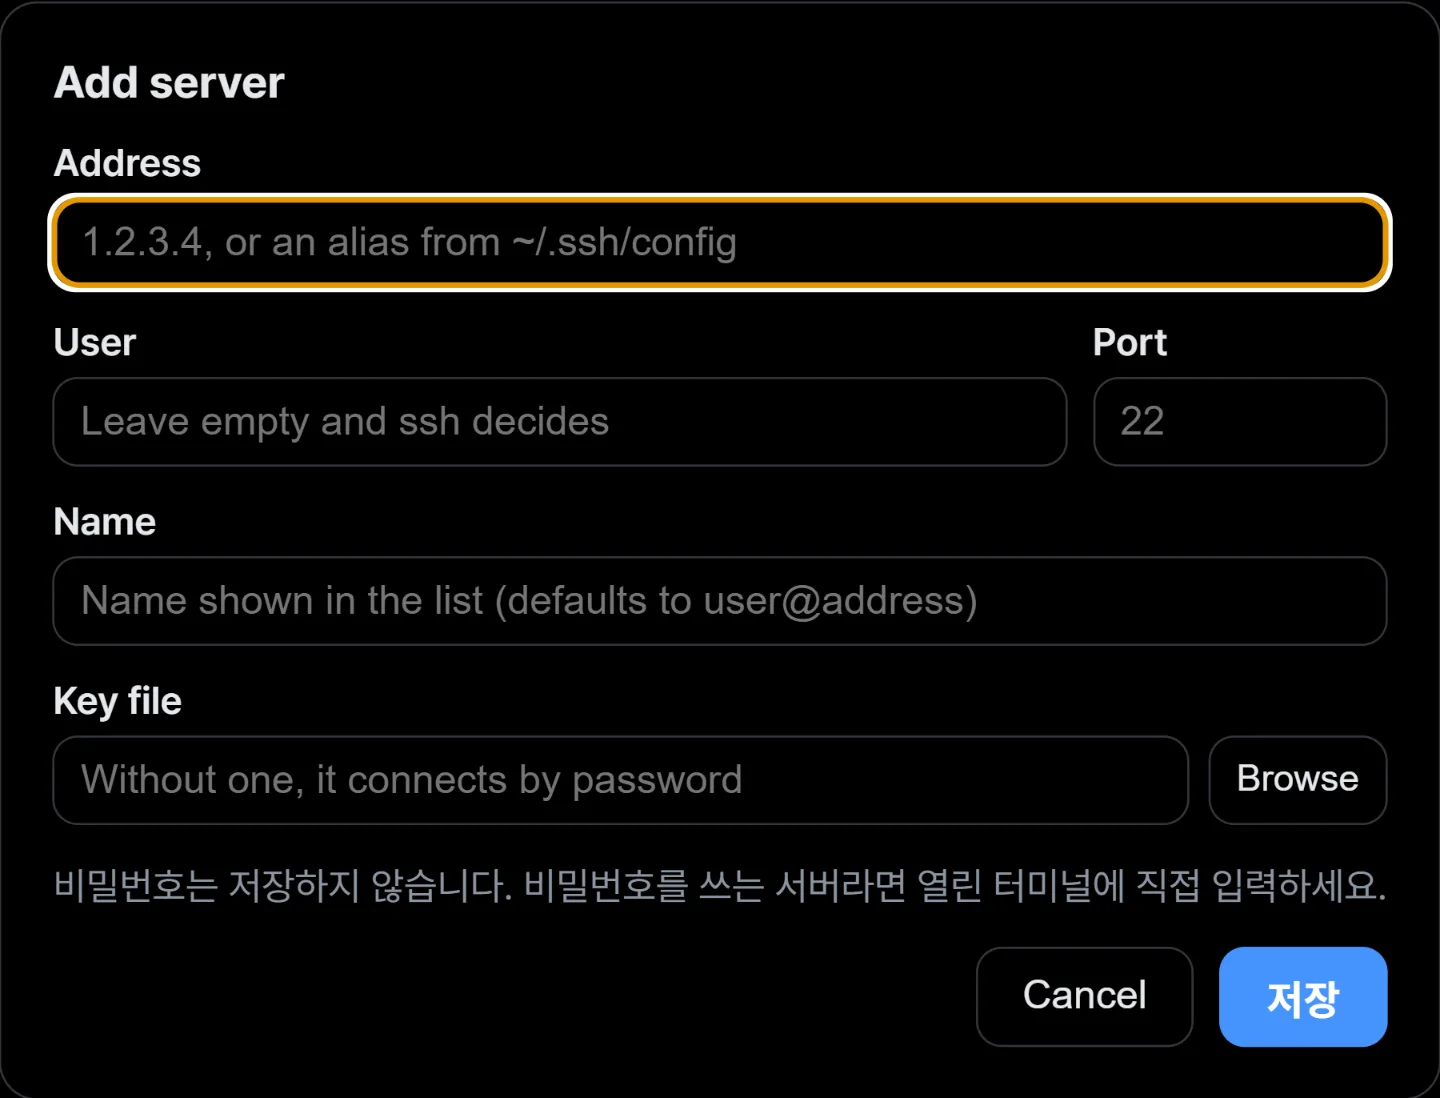
- Passwords are never stored. If the server uses one, type it into the terminal that opens.
- Key files are picked, then copied. The key you choose is copied into
~/.ssh— a private key in a shared folder is readable by other users, so ssh refuses it outright (Permissions … are too open). Keys already inside~/.sshare left alone, and a different key with the same name is placed beside it rather than over it. - It uses the OpenSSH that ships with Windows, so
~/.ssh/configapplies as it is. If you have a Host alias there, just put the alias in the address field.
Shortcuts
| Shortcut | Action |
|---|---|
| Ctrl+N | New file |
| Ctrl+O | Open file |
| Ctrl+S | Save |
| Ctrl+W | Close the current tab |
| Ctrl+Tab | Next tab |
| Ctrl+F | Find in the current document |
| Ctrl+Shift+F | Find across the open folder |
| F11 | Full screen |